Easy Chicken Sliders Recipe for a Quick Meal
Do you ever feel that 5:00 PM panic? The day is winding down, but everyone is hungry. You need a dinner solution that is fast, delicious, and doesn’t create a mountain of dishes. We have all been there, searching for that perfect balance between convenience and a meal that truly satisfies.
That’s where the magic of mini sandwiches comes in. These little bites have become a favorite across the country. They are perfect for a busy weeknight or as a fun appetizer when friends come over. Sliders deliver big flavor with surprisingly little work.
This guide will show you how simple it can be. With just a few good ingredients and easy steps, you can create a fantastic meal (chicken sliders recipe). You will master a go-to recipe that takes the stress out of feeding your family. Get ready to make your evenings a whole lot easier.
Introduction to Your Quick and Tasty Sliders
The secret to a stress-free dinner often lies in smart shortcuts. This approach brings you a fantastic meal without the usual fuss. You get maximum satisfaction with minimal effort.
Let’s explore why this method is a game-changer for your kitchen. You will discover how simple ingredients create an unforgettable experience.
Why You’ll Love This Method
You will appreciate the perfect blend of convenience and crowd-pleasing taste. It’s ideal for hectic days when time is short but expectations are high.
Your total hands-on effort is remarkably low. From start to finish, the entire process takes about 30 minutes. This makes it a brilliant last-minute solution.
It’s the kind of meal that makes everyone happy without keeping you tied to the stove.
These mini sandwiches shine as a main course for a family dinner. They also work wonderfully as a hit appetizer for your next game day or party.
Overview of the Ingredients
The list of components is refreshingly straightforward. You can find everything at your local store without a special hunt.
Using pre-cooked rotisserie chicken is the ultimate time-saver. It forms the foundation, skipping the need to cook and shred protein from scratch.
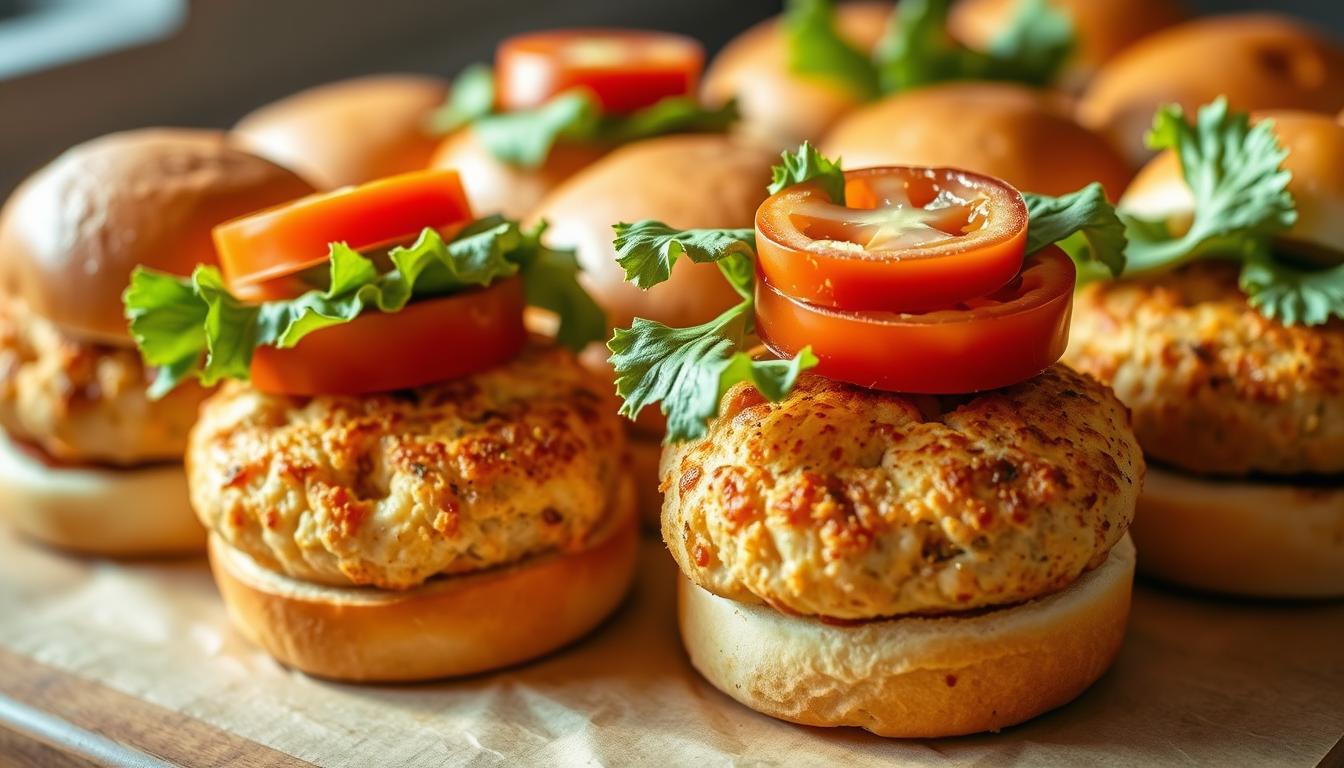
The right slider buns are crucial. Soft, slightly sweet varieties like Hawaiian rolls provide a perfect base. They complement the savory fillings without overpowering them.
| Component | Key Benefit | Prep Time Saved |
|---|---|---|
| Rotisserie Chicken | Ready-to-use, flavorful protein | 30+ minutes |
| Slider Buns | Perfect individual-sized portions | Baking from scratch |
| Pre-shredded Cheese | Quick melting, easy application | Shredding time |
Each element works together to build deep flavor layers. The result tastes like you spent hours, even though assembly is simple.
Gathering Fresh Ingredients and Preparations

Before assembly comes the crucial step of gathering your materials. Quality components make all the difference in creating memorable mini sandwiches. Thoughtful selection ensures every bite delivers maximum flavor.
Essential Ingredients and Brands
Your foundation begins with the perfect base. King’s Hawaiian Sweet Rolls offer soft texture and subtle sweetness. These buns create an ideal canvas for your flavorful fillings.
Rotisserie chicken serves as your time-saving protein hero. Look for moist, freshly cooked options from your local market. Use within two days for optimal food safety and taste.
| Ingredient Type | Recommended Brands | Preparation Notes |
|---|---|---|
| Cheese Options | Tillamook farmstyle cut, Kirkland cheddar | Shredded varieties melt beautifully |
| Sauce Components | Hidden Valley Ranch powder, chipotle mayo | Adds moisture and flavor complexity |
| Protein Enhancements | Hormel pre-cooked bacon | Crisp in microwave for convenience |
The right cheese makes your creation extraordinary. Tillamook farmstyle cut or Kirkland cheddar provide excellent melting properties. Sliced provolone or Swiss offer alternative flavor profiles.
Preparing Your Chicken and Veggies
Proper preparation ensures balanced bites. Shred your rotisserie chicken into small, uniform pieces. Aim for approximately 1/2-inch portions for perfect distribution.
Use efficient tools for quick results. A stand mixer on low speed shreds chicken in 30 seconds. This method saves time while ensuring consistent texture.
Small, uniform pieces prevent ingredients from falling out during assembly.
Vegetable preparation requires attention to detail. Slice tomatoes and onions thinly to maintain proper proportions. Mince garlic finely for even distribution in your butter mixture.
Bacon should be cooked until crisp and crumbled small. Pre-cooked options like Hormel brand offer convenience. Crisp them in the microwave for quick preparation.
Step-by-Step Assembly and Baking Process
Proper assembly technique ensures each bite delivers balanced flavor and texture. This method keeps the process simple while creating impressive results.
Setting Up Your Oven and Baking Dish
Begin by preparing your workspace for efficiency. Preheat your oven to 350°F to ensure proper baking temperature.
Select a 9×13 baking dish and grease it thoroughly. This prevents sticking and ensures easy removal.
Keep all rolls connected as one unit. Slice horizontally through the entire package to create top and bottom halves.
Layering Flavors and Building the Sliders
Place both halves cut-side up in your prepared dish. This allows for even ingredient distribution.
In a small bowl, combine your sauce ingredients. Spread this mixture generously on the cut surfaces.
Layer about half your cheese directly on the bottom rolls. This creates a melty barrier that holds ingredients securely.
Distribute your shredded protein evenly across the bottom half. Add any additional toppings in thin, even layers.
| Baking Phase | Temperature | Time | Result |
|---|---|---|---|
| Covered Baking | 350°F | 20 minutes | Melts cheese completely |
| Uncovered Baking | 350°F | 5 minutes | Golden brown finish |
| Total Time | 350°F | 25 minutes | Perfect texture |
Top with remaining cheese and carefully place the top rolls back on. In another small bowl, prepare your butter mixture.
Brush this mixture evenly over the top using a pastry brush. Cover the dish tightly with aluminum foil.
Bake covered for 20 minutes, then remove foil for 5 more minutes. The total baking time creates gooey, golden perfection.
How to Perfect Your chicken sliders recipe

Mastering the final touches transforms your sliders from good to exceptional. The right timing and techniques ensure every bite delivers maximum satisfaction.
Pay close attention to the baking process. After the covered baking time, lift a corner of the foil to check if the cheese has melted completely. This prevents removing them too early.
The final few minutes without cover create that beautiful golden-brown top. This adds both visual appeal and textural contrast to your creation.
Allow your mini sandwiches to rest for 2-3 minutes after baking. This brief pause lets the cheese set slightly, making cutting much easier.
When separating individual portions, use a sharp serrated knife. Follow the natural divisions between rolls with a gentle sawing motion.
For make-ahead convenience, assemble your dish up to one day in advance. Store covered in the refrigerator, then add five extra minutes to the covered baking time when starting from cold.
Apply the butter mixture generously but evenly across the top half. This ensures consistent browning and rich flavor throughout your finished product.
Customizations and Creative Variations
The true magic of these handheld delights lies in their incredible flexibility to match any taste preference or dietary need. Once you master the basic technique, you can easily adapt the components to create entirely new experiences.
Experimenting with Different Cheeses and Sauces
Your cheese selection dramatically influences the final flavor profile. Pepper jack adds a spicy kick, while smoked provolone offers depth. Sharp cheddar provides classic American taste that pairs well with many sauce options.
For sauce variations, consider mixing mayo with your favorite hot sauce for a spicy kick. Ranch dressing or seasoning mix creates a cool, herby contrast. You can even toss your shredded chicken directly in BBQ sauce before assembly.
Garlic butter enhancements open more possibilities. Add herbs like rosemary or mix in grated Parmesan for extra savoriness.
Alternate Protein Options and Flavors
While rotisserie chicken works beautifully, other proteins create exciting variations. Pulled pork, shredded beef, or turkey offer different texture experiences. Even sliced meats like ham or roast beef work well in these sliders.
For heat lovers, incorporate multiple spicy elements. Use pepper jack cheese, add jalapeños, and brush the tops with butter mixed with hot sauce. These recipes scale perfectly for larger gatherings too.
The butter mixture can include poppy seeds for visual appeal. Everything bagel seasoning creates a completely different taste experience. Your customization options are truly endless.
Ideal Serving Suggestions and Accompaniments

Your delicious creations deserve equally thoughtful presentation to complete the dining experience. The right pairings can transform these convenient sandwiches into well-rounded meal solutions for any occasion.
For family dinner service, balance the richness with fresh, crisp sides. A mixed green salad with light vinaigrette or tangy coleslaw provides perfect textural contrast. Most people enjoy 2-3 mini sandwiches per person when served as a main course.
Pairings for a Complete Meal
These handheld treats shine as game day food because they’re easy to eat with one hand. They hold up well on buffet tables and appeal to diverse palates. Set up a customization station with various toppings and sauces for interactive entertaining.
The sandwich format makes them incredibly portable for casual gatherings. Guests can grab one or two without needing plates and utensils. This convenience makes them perfect for sports viewing parties and casual get-togethers.
| Occasion | Serving Style | Recommended Pairings |
|---|---|---|
| Family Dinner | 2-3 per person with sides | Sweet potato fries, pasta salad |
| Game Day Gathering | Buffet-style platter | Wings, spinach artichoke dip |
| Party Appetizer | Small plates with dipping sauces | Honey mustard, BBQ sauce, ranch |
| School Lunch | Individual packed portions | Fresh fruit, vegetable sticks |
For party settings, these mini delights work beautifully alongside complementary options. Consider offering them with lemon pepper wings or barbecue nachos. This variety gives guests choices without overwhelming your preparation schedule.
The kid-friendly nature makes them excellent for school lunches too. Pack them in insulated containers while slightly warm. Alternatively, send them cold with a small ice pack for food safety.
Storage, Reheating, and Leftover Tips
The convenience of these mini sandwiches extends beyond initial preparation to smart storage solutions. Proper handling ensures you enjoy your creations for days while maintaining quality and safety.
Understanding the right techniques helps you make the most of your cooking efforts. You can prepare ahead or save leftovers without compromising taste.
How to Store Your Sliders Safely
Transfer your creations to an airtight container once they reach room temperature. This prevents moisture loss and maintains freshness.
You can refrigerate assembled sandwiches for 4-5 days. Place parchment paper between layers if stacking to prevent sticking.
The buns may soften slightly during storage, which is normal. The overall flavor remains excellent for quick meals throughout the week.
Reheating Guidelines for Maximum Flavor
For best results, use your oven at 350°F. Place the sandwich in an oven-safe dish and cover with foil.
Heat for 10-15 minutes until warmed through. The foil traps moisture, preventing the buns from drying out.
For individual portions, microwave with a damp paper towel for 60-90 seconds. Both methods restore the delicious qualities of your original creation.
Conclusion
With these techniques mastered, you’re equipped for any dining occasion. This approach delivers on its promise of providing quick, delicious meals that work for busy weeknights or gatherings.
You’ve discovered how rotisserie chicken serves as the perfect foundation, eliminating hours of prep while delivering restaurant-quality results. The simple assembly process makes this method accessible to cooks of all skill levels.
The versatility means you’ll never get bored. Experiment with different cheese varieties, try ranch versus spicy mayo, or add pepper for heat. You have complete control over customization in your small bowl mixtures.
These creations scale beautifully for any event. Make one dish for family dinner or multiple pans for game day crowds. The make-ahead capabilities maximize your time and effort.
From the soft Hawaiian rolls to the savory butter mixture brushed on top, every element works in harmony. You now have a reliable solution that will become a regular rotation in your meal planning.